iSpring Learn Update: Create Courses Online Right in the LMS
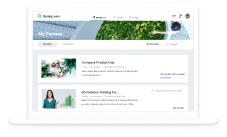
Say hello to Longreads, the newest tool in iSpring Learn LMS. Now, you can create articles with images, videos, knowledge check questions, and quotes right in the LMS.
You can make courses from scratch or put them together from existing content. Enter the headline, populate with text and images, and click “Publish”. Or just copy the ready-made article from any other document, add pictures and YouTube/Vimeo videos, and format the text. The course is ready — assign it to your employees and keep track of how far they have progressed.
The best part is that you can easily edit the material, even after it’s been published, so you’ll be able to refresh your eLearning content whenever you need.
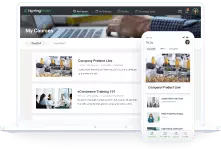
Courses automatically adapt to any screen size and orientation, which provides an enjoyable reading experience on both smartphones and tablets.
Go on reading to find out how to create an even better eLearning experience with the new Longreads tool.
Divide Content into Chapters
To make it easier for learners to navigate a course, you can divide it into chapters, which look like separate modules. This way they will be able to quickly find the part they need and properly map out their time — for
example, they can set out to read one chapter per day.
Add Questions
If you want to make sure your employees have grasped the material before moving on, add knowledge check questions.
There are three types of questions available: multiple choice, multiple response, and fill-in-the-blank. Simply choose the appropriate templates and quickly put together a test for your employees. You can add as many questions as you want.

You can provide detailed feedback on each question to help an employee polish their knowledge and improve performance. For example, explain why an answer is incorrect, provide useful facts, or refer to another article on a topic.

If a user makes a mistake, they are automatically shown the correct answer so they don’t have to reread all the material. You can turn off feedback if necessary.
Note: Mind that learners’ answers are not tracked in the LMS. You can use them only for employee self-assessment.
How to Create a Course with Questions in iSpring Learn
- Click the Courses tab in the main menu of iSpring Learn and choose Create → Longread.

- On the line Longread title, enter the headline of your future course. In the field above the title, you can mark what type of content you have — for example, a manual, a case study, or a book review, or set the topic of the course. To add a cover image, click the respective button in the top right corner.

- For your convenience, an introduction module is already there. Go on writing the main part here or create chapters like in a book to make browsing simpler. To do this, click Add a chapter.

- Enhance your course with images, videos, lists, and quotes by hitting the plus sign and choosing the appropriate type of content.

- To insert a link or create subtitles, select the text and choose the relevant option from the toolbar.

- To add a test to your article, click on the plus sign and select Exercise.

This will bring up a toolbar with options. Choose the appropriate template and add answers. Here, you can also upload a picture and write a text for feedback.
To make tasks more challenging, you can randomize the order of answers. Just turn on the Shuffle answers option in the Settings.

7. You can edit the look and feel of your course to match your corporate identity. Simply apply the desired color scheme and font.

8. You can also control how your learners will navigate your course by choosing Free or Restricted as the navigation mode.

With free navigation, a user is able to jump to any part of the course as they wish. For example, they can look briefly through the information they already know and study the new material more carefully.
With restricted navigation, a user must view chapters one by one — they can access a new chapter only after they’ve completed the previous ones. Restricted navigation is usually used when a learner needs to study the content from cover to cover.
- You can see how your course will look on a tablet or smartphone before you publish it. Simply click the Preview button.
- Choose Publish and select a folder to save your course.

Assign the content to your learners or groups and keep track of how they read it page by page.
Get an iSpring Learn free trial to test-drive seamless online authoring.


