How to Screencast: Tips & Tricks
Are you an eLearning professional who wants to make screencasts for training courses? Or are you going to start your vlog on YouTube and show how to use specific software? In this article, we’ll explain how to screencast, which tools to choose, and what to consider before recording.
Table of contents:
How to Record a Screencast in iSpring Suite
Tips for Creating Captivating Screencasts
Those who are interested in viewing the video on how to make a screencast can do so here:
What is a Screencast?
A screencast is a video recording that captures the actions that take place on a screen. You can also often hear people calling it a screen capture video or a screen recording. A screencast can contain various objects like text, images, audio, and even mouse movements.
How Are Screencasts Used?
As you can see, a screencast is a type of video tutorial that is most often created to demonstrate a process that’s shown on the screen.
Screen recording software now enable screencasting on any type of device, even on smartphones. For example, there are plenty of screen recording and screen mirroring apps for iOS and Android that help bloggers make screencast videos on the go. However, when we think of screencasts, it’s probably education that first comes to mind.
So, use cases for screencasts include:
- Training for non-techies. With screencasts, you can show your learners how to use specific features of Microsoft Excel or other tools. Compared to unclear written explanations, screencasts make more sense.
- Classroom work. Screencasting helps teachers save more time when introducing a topic in the classroom and invest more time in practice, communication, and discussions. A teacher can record their screen while explaining how to solve math equations and share the video with students so they can watch it before coming to class.
- Software demos and tutorials. Businesses that produce or sell software, or offer a web service can benefit greatly from making video tutorials on how to use their tools. This is another instance where screencasts can come into play.
- Visual explanation. Skillful photoshoppers, advanced users of Microsoft Excel, and other software experts use screencasts to share their knowledge with the world.
- Gameplay streaming. For gamers, a screencast is a way to share their gameplay with the world, as well as get feedback on their skills and teach their peers how to improve their performance.
How to Make a Screencast
Whether you’re making a screencast for personal use, a classroom, an online course, or a YouTube video, here’s how you to do it in six easy steps.
Step 1. Make a plan and write a script
You have only 10 seconds to capture and engage an audience and thus set your screencast up for success. From the very beginning of the video, they should understand that this screencast is what they need now. To captivate your viewers right away, plan your video. This is, in fact, a structure for a future tutorial: where to start, what to show in the middle, and how to end. Then prepare a script.

Don’t skip this step before you start recording, as the script will help you:
- Make your screencast more concise. Individuals who record a video with only bullet points usually add unnecessary information. With a script, you’ll stay on message.
- Think about some talking points and tips that will make the lesson more useful. One approach is action mapping. Think about it from the perspective of what knowledge needs to be transferred, or perhaps even what issues need to be solved, then define the actions that need to be taken to do that.
- Figure out what you should show. You have to decide if you want to describe everything that is happening on the screen or if you’re okay with the visuals supporting the script. Using a voiceover (VO) makes it significantly more engaging and effective, with text or graphics to highlight key points and ideas.
- Avoid unnecessary pauses while recording. Remember that script? If you’re “umm”ing and “ahh”ing, you should go back and write it!
- Reduce the time for video editing. You don’t need to cut out unnecessary phrases and merge different parts of the audio track.
Writing a script is actually quite easy. In an instructional video, the first few moments should draw the viewer in and give them reasons to watch what you have to present. You’ve got to make your screencast the center of attention and keep learners focused.
Don’t use the first five seconds of your video to tell people your company name; use them to share why they should keep watching. This can be done with a dialog or graphics.

You can start with a statement about the goal and provide a plan of your tutorial so a viewer can see what to expect right away. For example:

In the middle of the screencast, you need to describe the topic in as much detail as needed. This will help you to transfer the knowledge really required and provide your viewers with solutions they expect. Keep it lean (lean is interesting). At the end, you can give a summary and go through the key points once again if your video is long. If it is short and focused on one topic, repetition may not add value. You may also want to give the viewer an action they can perform. This also helps to further anchor the learning.
For example, if your video is about creating a new PowerPoint template, rather than recapping the steps, invite viewers to actually do it. If you’re worried about the viewer remembering the steps, it’s probably better to provide a handout that’s easy to open in another window, download, or print. It can be a job aid, a list of frequently asked questions, or a compilation of related articles sent in your newsletter. At the very end, give a preview of the next lesson.
Write the script in a conversational tone, without complex phrases or a lot of acronyms and jargon.
It’s okay to use contractions, even slang. Keep your audience in mind — using more informal language will make your video easier to understand and, hopefully, put your viewers at ease with the presenter.

To make sure the text works, read it aloud. This will help you notice complex phrases or awkward transitions. Are there places in the script that don’t sound natural? If so, make the necessary touch-ups.
| Descriptive | Conversational |
| iSpring Learn is a simple but effective Learning Management System designed for teaching and assessing employees or students online that, aside from providing learners quick and simple access to their courses, allows you to create your own learning materials and gives you complete control over the learning process. | iSpring Learn is a simple and effective Learning Management System. It’s designed for teaching and assessing employees or students online. The LMS provides learners with quick and easy access to courses. The system also allows content producers to create learning materials and manage the learning experience. |
You can also check the text for readability in Hemingway. This online editing tool will help you find complex sentences and phrases, excessive adverbs, and passive voice constructions that you can turn into active voice.

When writing your script, make sure that you choose words that have a purpose. Make each word fight for its place in the script. If the word isn’t helping the viewer to understand or move towards the purpose of the video, consider cutting it. A concise script is more understandable. Be direct.
Tip: To get started, watch this video course about script writing and download a free script template.
Step 2. Choose a microphone
A headset or a built-in laptop microphone are bad tools for voice acting. Ambient background noises such as hissing, crackling, or echoing may appear in the recording. Use a separate microphone for making screencasts.
First, define the type of device you need:
- Dynamic mics block out room echo and background noises well. Most often they are used by musicians at concerts, where there is no time for sound processing.
- Condenser mics, to the contrary, catch even the ticking of a clock. But if you record your voice in complete silence, you can achieve a decent sound using this type of device. Condenser mics are most often used at radio stations.
Another important consideration is how it will be connected to your computer:
- ХLR mics are of high sound quality, but they are connected to a computer via an external sound card or a special adapter. You need to buy it separately.
- USB mics can be plugged into an available USB port on the computer. It’s much easier. However, the sound quality is sometimes worse than that of ХLR devices.
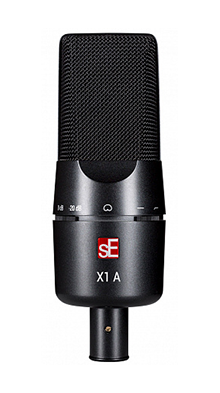
Here you can see six microphones that are good values for voice-over actors to start making decent recordings:
| Samson Q2U ~ $ | Blue Snowball Ice ~ $49.99 | SE ELECTRONICS X1 ~ $99.00 |
 |  |  |
| Dynamic mic Watch a review and listen | Condenser mic Watch a review and listen | Condenser mic Watch a review and listen |
| Audio-Technica AT2020 ~ $83.95 | Blue Yeti USB ~ $129.36 | Rode Podcaster ~ $229.00 |
 |  |  |
| Condenser mic Watch a review and listen | Condenser mic Watch a review and listen | Dynamic mic Watch a review and listen |
Useful microphone accessories
These accessories can help to achieve a pure sound, even if you are recording a voice on the street or in an apartment next to a construction site.
A microphone isolation shield partially mutes extra sounds in the room and filters out the echo. As a rule, it is placed behind the microphone.
The video shows how a voice sounds with and without an isolation shield
A pop filter suppresses breathing noises, softens sibilant “s” and “sh” sounds, and blocks plosives like “p” “b”, and “t”, which can max out the decibels and sometimes cause signal clipping.
An example of how a pop filter works
Step 3. Install screen recording and video editing software
In addition to a microphone, you’ll need a recording tool to record your screen. For the popular search term “screencast software download,” Google returns about 1,050,000 results. Among them are some product reviews and developer websites where you can download the software.
Opt for the screen recorder that will also serve as a video editor and enable you to produce any type of instructional video with annotations, transitions, and other helpful effects. Test-drive the screen recorder in advance to find out if it suits your level of tech proficiency.
One of the user-friendly tools for recording screencasts is iSpring Suite, which only needs PowerPoint to be installed on your PC. You can use the iSpring Suite authoring tool for free during 14 days and create as many screencasts as you need with the guide you’ll find below. For now, let’s return back to the steps to facilitate great screen recording.
Step 4. Prepare the room for recording
No matter how good a microphone is, it can’t completely block ambient background noise. That’s why you need to prepare before recording:
- Choose a small room for recording. In a large room, your voice will echo off the walls more loudly.
- Close the windows tightly, turn off phones, computers, fans, and any other appliances. Make sure your chair doesn’t squeak.
- The room shouldn’t be empty; otherwise, the sound will be hollow, as if you are sitting in the bathroom.
If you plan to keep doing your own voiceovers and screencasts, slowly build up the acoustic treatment in your recording area; invest in something like a Whisper Room. If you don’t have a dedicated recording space, put up heavy blankets, heavy curtains, anything you can to put mass between your recording space and the outside world.

Tip: Hang an “On Air” sign on the door so that colleagues or kids (or both) don’t stumble into your session.
Step 5. Prepare your voice for recording
When recording a voiceover, you need to read the text in a light and convincing manner. It’s difficult to do this if you’re distracted, as you need to pronounce words correctly and decide which syllables to emphasize. So, before recording, do some rehearsing – read the script aloud several times. An expert tip: to ensure that your voice sounds good, have some tea with lemon 10-15 minutes before the recording session. This will soothe your vocal cords and make your voice deeper and ‘cleaner.’
While recording, it’s incredibly important to use the microphone properly. It shouldn’t be too far from your mouth, because it will pick up more ambient noise, nor should it be too close, because it can pick up unwanted mouth sounds and max out the decibels. Also, make sure the volume is adjusted properly, so the final effect is a nice fat waveform with no signal clipping
Breathing naturally is essential as well. No one wants to listen to a robot, even if that robot has a beautiful voice. You want to sound like you’re talking with someone or teaching someone. You aren’t just reading words from a page. You’re trying to make them come alive, even with training material.

Tip: Posture also affects the quality of the recording, so keep your back straight. At the same time, the belly should be distended and the chest pulled forward. Correct posture will support you and help your voice sound stronger and more expressive.
Step 6. Record the screencast
Here are some tips that will help you make a high-quality screencast:
- Before recording, keep unwanted objects from view. Nobody wants to see the toolbar with the Start button if it’s not going to be used.
- Turn off pop-ups and messenger notifications, so you don’t have to re-record the video after a message from your mom pops up in the corner.
- Record screencasts at a resolution of 1280×720 px (720i). If you make the resolution any smaller, the viewer won’t be able to see what is happening on the screen clearly and there will be black margins around the video after uploading it to YouTube.

Screen recording at 640×480 resolution

Screen recording at 1280×720 resolution
- Take breaks. If you need to collect your thoughts or drink some water, take a break. Only first-class professionals can record a screencast on the first take. The key is high-quality content.
- Record voice and screen separately. This helps to avoid extra takes. For example, if you narrate a line incorrectly, you won’t have to re-record what is happening on the screen. It’s sufficient to read the complex paragraph one more time and sync it with the video file.
- Remove unwanted video scenes. The screencast should begin as soon as the viewer clicks on the Start button. “Dead air” at the beginning and at the end of the lesson is a waste of time. Cut unwanted clips (pieces of video or sound) mercilessly.
How to Record a Screencast in iSpring Suite
To show you how to create screencasts, we’ll use iSpring Suite, which is an authoring toolkit for creating online courses and other types of instructional materials, including screencasts.
With iSpring Suite, you can record video from your screen and/or webcam. It also has a built-in video editor to add hints to screencasts, mix different tracks, glue video fragments together, and add smooth transitions between scenes. To make screencasts today, install iSpring Suite and start using it straight out of of the box.
Then, you need to decide on the format of your video – depending on that, the ways to create a screencast will slightly differ. iSpring allows you to create a screencast with narration or a screencast with a webcam video, here’s how:
A screencast plus narration
After installing iSpring Suite on your computer, you’ll see an additional tab in PowerPoint. Click on Screen Recording.

Then, in the Recording Settings window, choose the Screen tab.

Make sure your microphone is on. Then, specify the size of the recording area: this can be a portion of the screen, the entire screen, or the window of a specific application.
As you record, there are a few things to keep in mind to create a clean looking video.
- Hide your mouse cursor so it’s not distracting to your viewer, or make sure the cursor is clear and visible if it’s part of the tutorial.
- Pause if you make a mistake, so when you edit, it’ll be easier for you to find the places where you’ve made mistakes and cut them out.
- Speak clearly and with the tone and pace you have chosen for the video.
A screencast plus a presenter video
If you’re going to record a screencast and a webcam video at the same time, choose the Screen and Camera option in the Recording Settings window. You can show both streams together, or easily switch between them.

After your recording is complete, you can edit it. Remove noise and unwanted video, glue video fragments together, and add video effects.
To learn how, check out this guide and watch this tutorial:
Tips for Creating Captivating Screencasts
Here are some tips and tricks that can help you make your screencasts even better looking and more engaging:
- To add more clarity to your screencast, complement it with other media. For example, your screencast can include pictures, photos, infographics, and different video footage.
- Another way to make things easier for viewers to understand and, at the same time, attract their attention to certain points, is to create annotations, graphs, and captions. For instance, outline the steps of the process that you demonstrate on the screen.
- To direct your viewer’s eyes where you want them to go, spotlight mouse actions. With tools like iSpring Suite, you can highlight a cursor and add click sounds. However, keep in mind that excessive mouse movements are distracting, so hide your mouse when it’s not being moved.
- In order for your video to look professional, connect the segments with transitions. The scenes should naturally flow from one to the next, with no abrupt cuts.
- If you demonstrate an onscreen process without any voiceover instructions, add some music to set the mood of your video tutorial.
Frequently Asked Questions
Here are a few more questions on making screencasts. Feel free to take a look.
How do I screencast on Windows?
The most common way to screencast from Windows is through the Game bar, which you can find in Settings. However, it makes screencasting rather cumbersome and limits your options. If you want to find a robust desktop app for Windows, try iSpring Suite – the tool only needs PowerPoint, but making any type of instructional video is a piece of cake with it.
How to choose a screencast software?
It’s best to keep the following 3 characteristics in mind and look for them when choosing a new screencast recorder:


To Sum Up
Screencasting is a great solution that helps bridge the gaps for globally connected workforces, teachers, students, software developers, and customers. Making a screencast allows the person on the other end to hear your voice and provides important context to your words. However, it’s not only an effective but also a simple instructional tool that you can jump into and use today. To get started with screen recording, download a free iSpring Suite trial right away.


