How to Create Microlearning Courses: Breaking It Down

Our busy lifestyles and hectic schedules are changing the way we consume and digest information. Instead of investing hour upon hour teaching or learning about theoretical concepts that cannot be readily applied, many businesses and training centers are now opting for microlearning - a masterful method of delivering employee training.
Are you an instructional designer or L&D representative making an initial foray into the world of microlearning? Then keep reading! In this article, we’ll show you how to create microlearning content.
What Is Microlearning?
Microlearning is best defined as a method of instructional training that breaks information down into bite-sized chunks for easy digestion prior to delivering it. As such, its approach differs from traditional learning (e.g., schools and universities), wherein learners are often overwhelmed with and tested on theoretical concepts that aren’t necessarily relevant to their goals. Everyone who’s experienced formal education has likely asked themselves, “What’s the point of this?” or “Will we be tested on this?” Microlearning aims to address the incongruence between training content and learning outcomes.
Microlearning is tailor made for individuals who need to maximize knowledge retention in the shortest time possible. This knowledge must be practical, “hands on,” and bear direct relevance for the learner. By eliminating extraneous information, microcourses are highly focused, tend to target a single learning objective, and therefore have a maximum duration of around 5-7 minutes.
And because microlearning goes hand in hand with online training, it eliminates constraints imposed by time and space. Instead of taking time away from loved ones, hobbies, and personal obligations, trainees can complete lessons during their daily commute, lunch break, or during any slow period or downtime. The best part is that microlearning content takes many forms, including, but far from limited to, video tutorials, simulations, assessments, and online presentations.
Who Needs Microlearning, and Why?
The approaches used in formal education often don’t take into consideration the inherent needs and nuances of adult learners, who often work full-time jobs while juggling multiple priorities. These are the contexts in which microlearning is most relevant – where it can adapt to the psychology of the adult learner.
That being said, anyone can benefit from microlearning – because the core of this approach entails short, highly focused, and highly applicable content. Regardless of one’s age, educational background, or career, learners learn best when they feel that they’ve received a customized training solution – that is, when the content is focused on skills needed in their daily lives, when it’s informal, and when it’s available at the point of need.
Let’s say your company has a course on health and safety in the workplace. You’ve already received comprehensive training and practice on this subject, but you need to specifically review your hazardous substances control measures. Rather than having to comb through an entire video or lesson to find this section, your training would ideally consist of microcourses logically arranged so you can access them whenever you need to. This way, you can access this content quickly, while minimizing disruption to your workflow.
The following list shows the kinds of people/scenarios that get the most out of microlearning:
- Millennials and Gen Z learners who are tech-savvy and fluent in all things “digital”
- Businesses that require ongoing employee training while minimizing costs, reducing disruptions to operations, and accommodating employee schedules
- Adults who’d like to upgrade their skills in the workplace without all the red tape of formal education
- Individuals who are looking for a quick fix/solution to a problem (e.g., how-to videos, DIY tutorials)
- Anyone who needs to upgrade or gain a new skill set, but whose schedule is constrained by time, dates, and distance
How to Design Microlearning
As mentioned, microlearning isn’t as concerned with content as it is with the method of delivery. However, the content should be conducive to a few key concepts that we’ll cover in this section, such as single-outcome learning objectives and chunking. Moreover, your method of designing microlearning ultimately depends on how you plan to deliver it. So, for the purposes of this guide, this section covers how to create microlearning courses/modules in 6 simple steps.
Step 1. Research and choose a highly focused topic
This step is as simple as it sounds – choose a narrow topic. The more you pare it down, the easier it’ll be to create learner-focused, outcome-driven content. But once you’ve determined your topic, don’t do yourself a disservice by rushing into it headfirst. If you’re looking for a worthwhile return on your investment of time, money, and effort, then you’ll need to place yourself in your trainees’ shoes to ensure that the subject matter correlates perfectly with each of their specific roles within your organization. That way, you’ll maximize the learners’ perceived value of the training, and therefore, their overall levels of engagement.
Step 2. Know your audience
When creating microcourses, your chief consideration should be your audience. Once you know and have refined your topic, you can start narrowing your audience down based on which colleagues or samples will likely find your topic useful.

Before you decide to format your lessons as microlearning courses, you should have already answered these questions. Once you’ve clearly defined your target audience, all other decisions should be determined by their needs.
Step 3. Determine a singular learning outcome
Learning outcomes state what specific skills you’d like your learners to take away from your course. This step is only second in importance to knowing your audience, because, again, learning outcomes aren’t about your wants and goals; they’re all about your trainees’ needs. Therefore, if you fail to read your audience correctly, you’re going to miss the mark when it comes to developing learning objectives.
Let’s say you’re providing general training for managers, supervisors, and/or team leaders on how to enhance their leadership skills in the workplace. Because leadership is inherently multi-faceted and complex, it can be difficult to single out which specific skills you need to have your trainees to come away with. Thus, your microlearning content should be centered on a singular learning outcome.
To avoid getting carried away or detoured from your learning goals, write them out using action-oriented verbs, as exemplified below:

The difference between the poorly written and well-written learning outcome lies in the agentive nature of the verb “understand” versus “identify.” Identifying leadership skills is a concrete, measurable action, whereas understanding them is an abstract process that cannot be measured or assessed.
When you’re creating courses, high-quality learning objectives are key to ensuring success. Because microlearning emphasizes highly focused, action-based training, how well you define your learning outcomes will make or break your course.
Step 4. Create and chunk your content
The curation process becomes exponentially easier once you’ve developed crystal clear learning outcomes. Now you can brainstorm and begin fleshing out your ideas. Once you have enough talking points, you’ll want to organize them into an outline of your microlearning courses. “Chunking” is the practice of dividing your content into as many sections as possible. The idea is to break each section down to its “atomic state,” such that they cannot be logically broken down further.
These bite-sized sections each represent one of your scripts. Ideally, each microcourse should pertain to one of your learning outcomes. Accordingly, if your training has 5 learning objectives, then you should create 5 microcourses that directly address each. In essence, microlearning aims to provide quick answers and solutions to specific problems; they function as practical hands-on guides.
In keeping with our “health and safety in the workplace” theme, here’s an example of how one might chunk the content for a series of microcourses.

Step 5. Build a microcourse
At this stage, we step away from the planning process and dive right into the development process. Here, you’ll need authoring software to put all the contents together. There are some tools that allow you to do this in a matter of minutes without a single line of coding.
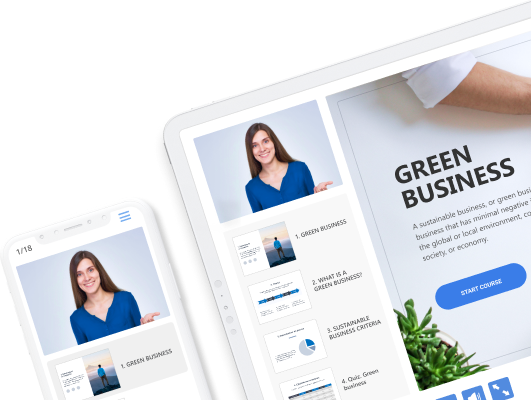
For example, iSpring Page is a super easy-to-use authoring tool that lets you build microcourses right out of your browser. You can create adaptive training with texts, images, and videos, and enhance it with knowledge checks.
And because the content adapts to any screen size or format, employees can train anytime or while on-the-go. Not only is iSpring Page incredibly intuitive, but it does much of the legwork for you and/or your development team.
Check out the following demo course to see iSpring Page at work:
In a matter of minutes, the sky’s the limit!
Step 6. Distribute the final product
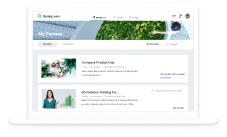
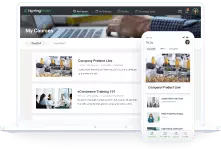
Now that your course is complete and you’re satisfied with the final product, consider distributing a pilot version to a test audience to work out any kinks and unforeseen issues. Many companies prefer to deliver training via a learning management system (LMS), as it provides a lot of benefits. With an LMS, you can automate the training process – simply upload your course to the platform, assign it to your learners, and keep track of their results.
If you still haven’t decided on an LMS, you can try iSpring Learn. It’s easy to use and perfectly compatible with industry-standard authoring tools, including iSpring Page.
Tips for Creating Microlearning Content
Now that we’ve laid out critical steps for microlearning creation, it’s time to refine your approach for each step. In this section, we’ll detail some key tips to keep in mind as you progress through the microlearning creation process.
- Engage different learning styles. Some people learn best with sound, whereas others work best with words or images. That’s why microcourses are a great choice. They can be delivered as digital learning and seamlessly incorporate multimedia (e.g. videos, images, and infographics).
- Choose a responsive authoring tool. With everyone constantly on-the-go, the future is mobile responsiveness – the ability of your training content to “respond” or visually reformat itself to any screen size/width. If you limit your audience to desktop devices, you’re bound to create inconveniences. And as you know, convenience lies at the core of microlearning.
- Provide additional resources. As mentioned, microlearning differs from formal education because it narrows the learning to the “need-to-knows.” But what if trainees have questions beyond the scope of what’s covered? For these instances, it’s great to anticipate what these questions could be and provide “further readings.” These external links/sources are not only effortless to include, but your course will feel more comprehensive and complete.
- Incorporate storytelling, where possible. It’s no secret that people learn best through experiences. Sometimes these are vicarious and brought to life through storytelling. Not only are stories immersive, emotional, and thereby engaging, but this increased level of engagement enhances learner knowledge retention. Storytelling also supports another core tenet of microlearning that we’ve touched on – simplicity.
- Provide context with relevant examples. As with storytelling, providing examples enables learners to immerse themselves in some knowledge-instilling experience. However, examples take storytelling to the next level by providing scenarios in which the training is directly relevant. Therefore, your learners will be able to make a one-to-one correlation between what they’re learning and the contexts in which they can apply those very same skills.
Take a look at this iSpring Page demo. It provides plenty of examples for trainees to decipher between poor and proper visual design practices:
Final Thoughts
We live in a fast-paced age of convenience. Consequently, microlearning has been gaining ground as a quick, painless, and hands-on learning method. Though it doesn’t replace formal education perfectly as an instructional method, microlearning has its home in the working world.
Adults with full-time jobs need the convenience and flexibility of learning when it suits their schedule. This allows them to choose an ideal, distraction-free environment for maximum concentration. With microlearning, they can leverage any free or personal time (e.g., lunch breaks, daily commutes, workouts) to consume these bite-sized courses. Remember, the prime concern of the adult learner is practicality – they need simple and relevant answers that can be directly applied to their lives.
That being said, while microlearning simplifies the process for employees, you can’t take any shortcuts with the planning process. Start by zeroing in on a target audience. Moreover, focus on making your content as engaging and relevant as possible. And remain forward-thinking – choose an authoring tool that can brave the wave of the future.
Why not get started with a credit-card and commitment-free trial of iSpring Page?


