

How to create a mini game in PowerPoint: A step-by-step guide

In this article, we will demonstrate how to create trigger and animation tricks, set up navigation by using hyperlinks in your presentation and implement a strict navigation scenario. As an example, we’ll build a mini game from scratch using standard PowerPoint tools.
You can also watch a webinar recording on the topic if you prefer:
How the game works
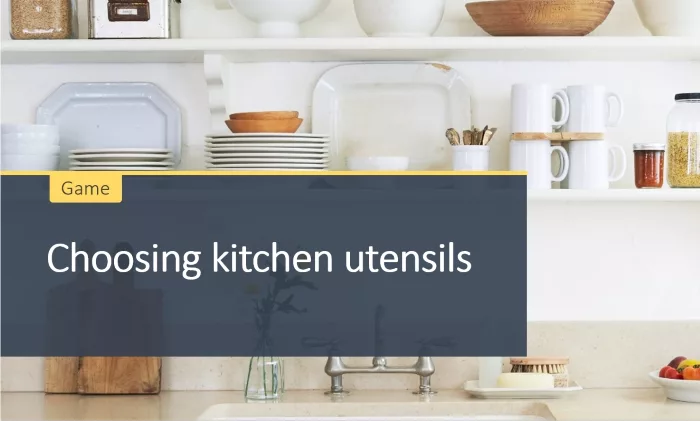
Our example is a game in which we should pick tools and ingredients to cook an omelet. And we can’t unlock the next slide until we select all the right objects :) Let’s see how the game works in the slideshow mode:

Before you start, please grab the resources: https://ispri.ng/72vR6
Now let’s create this game step by step so you can learn how to use the same tricks in your own presentations.
Stage 1. Inserting objects
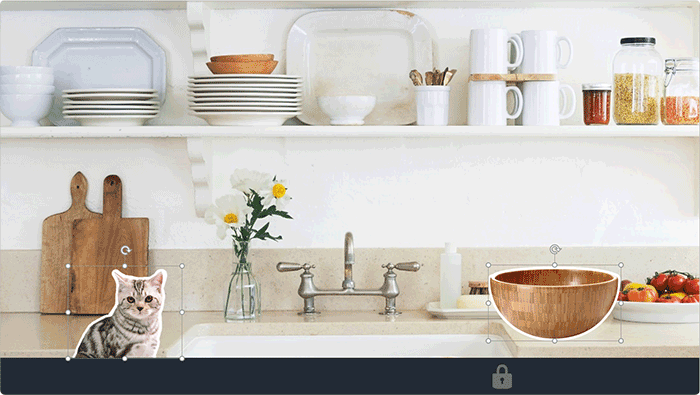
- Open PowerPoint and create a blank slide. To describe the main idea of how it works, we’ll use just one correct object (the bowl) and one incorrect object (the cat). You can add the rest of the objects later using the same instructions.
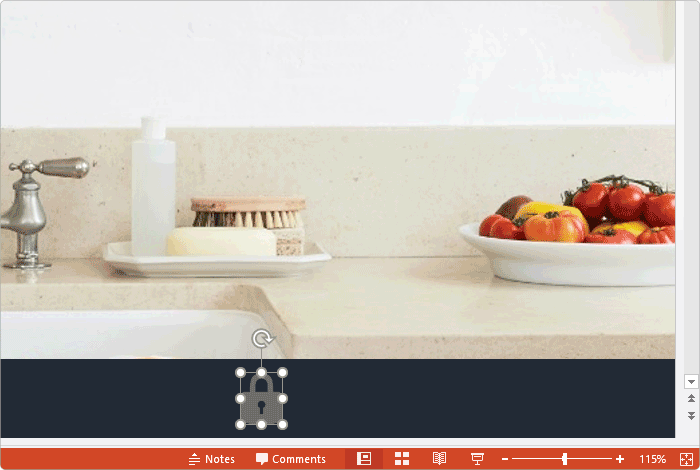
- Get the background picture from the resource folder and add it to the slide. Go to the Insert tab → Pictures and find your downloaded folder with all the files and choose the object called “Background”. Put it on the slide so that there is a blank space for inserting the bottom panel.
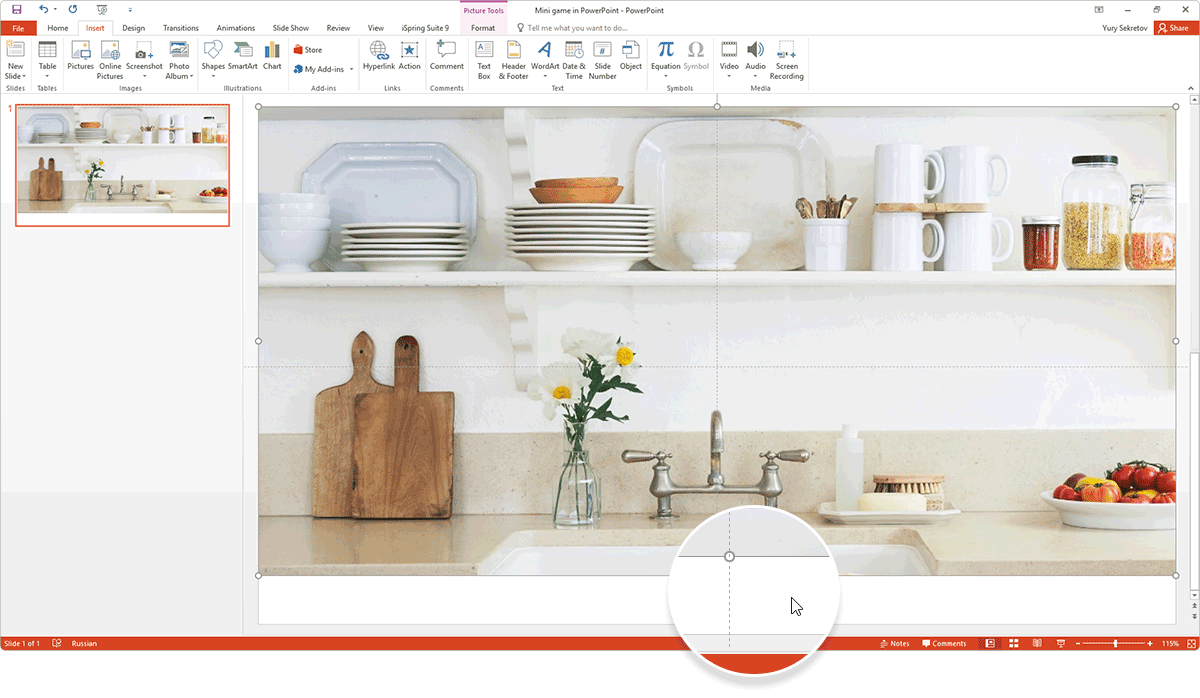

After that, insert the bottom panel. To do this, go to Insert → Pictures, select the picture “Bottom panel”, and place it in the corresponding blank field.
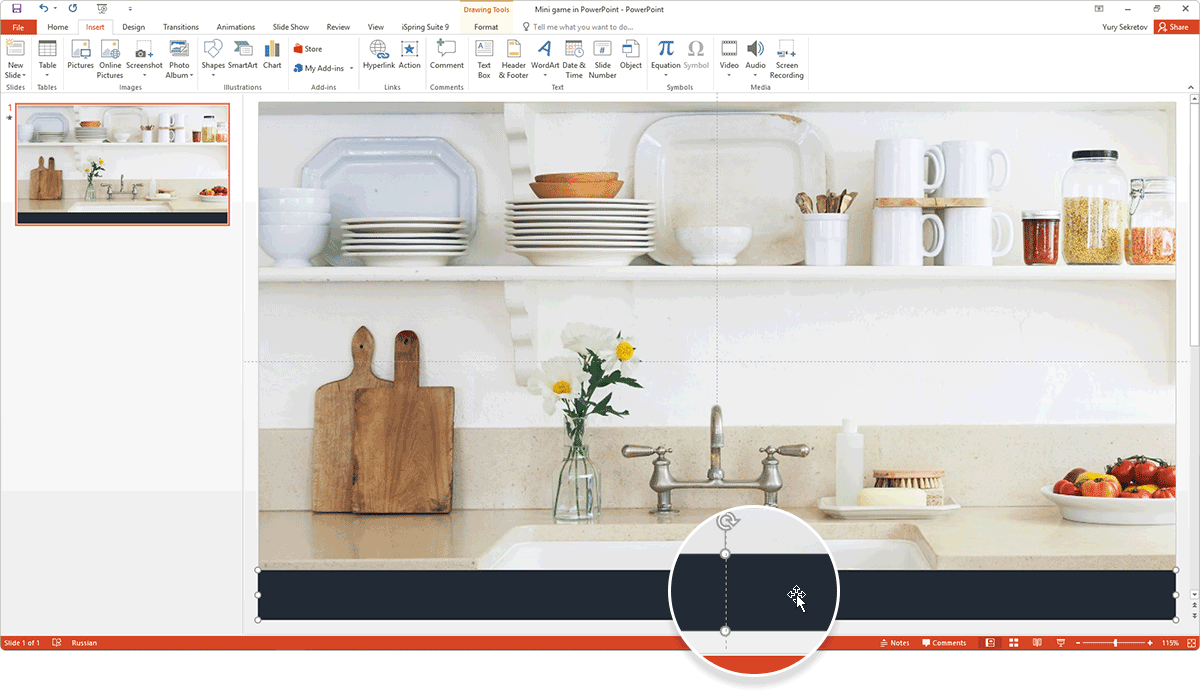
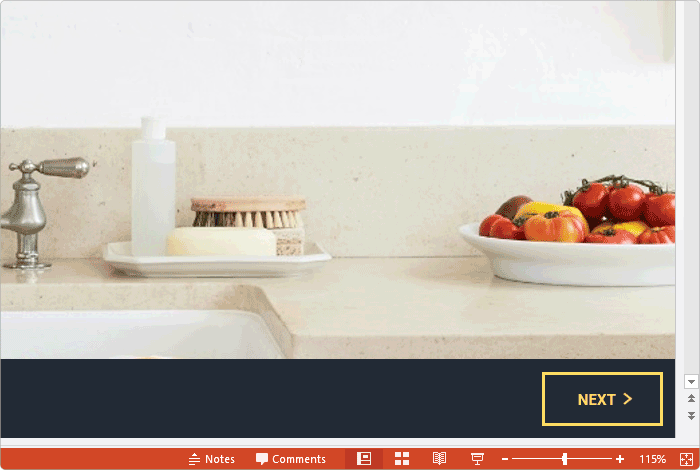
Now, insert the Next button, which we need to go to the next slide of our presentation. (Insert → Pictures → Next button).

To block the slide navigation, add a dark rectangle over the button. Select Insert → Pictures → Dark rectangle.
To make our mini game more interactive, let’s add a lock to the bottom panel (Insert → Pictures → Lock).
For the next objects, the cat and the bowl, we will create triggers and animation effects. Add the pictures called “Cat” and “Bowl” from the resource folder:

To highlight a feedback message and prevent users from accidentally clicking on another object, add a transparent layer over our objects (Insert → Pictures → Transparent Layer).

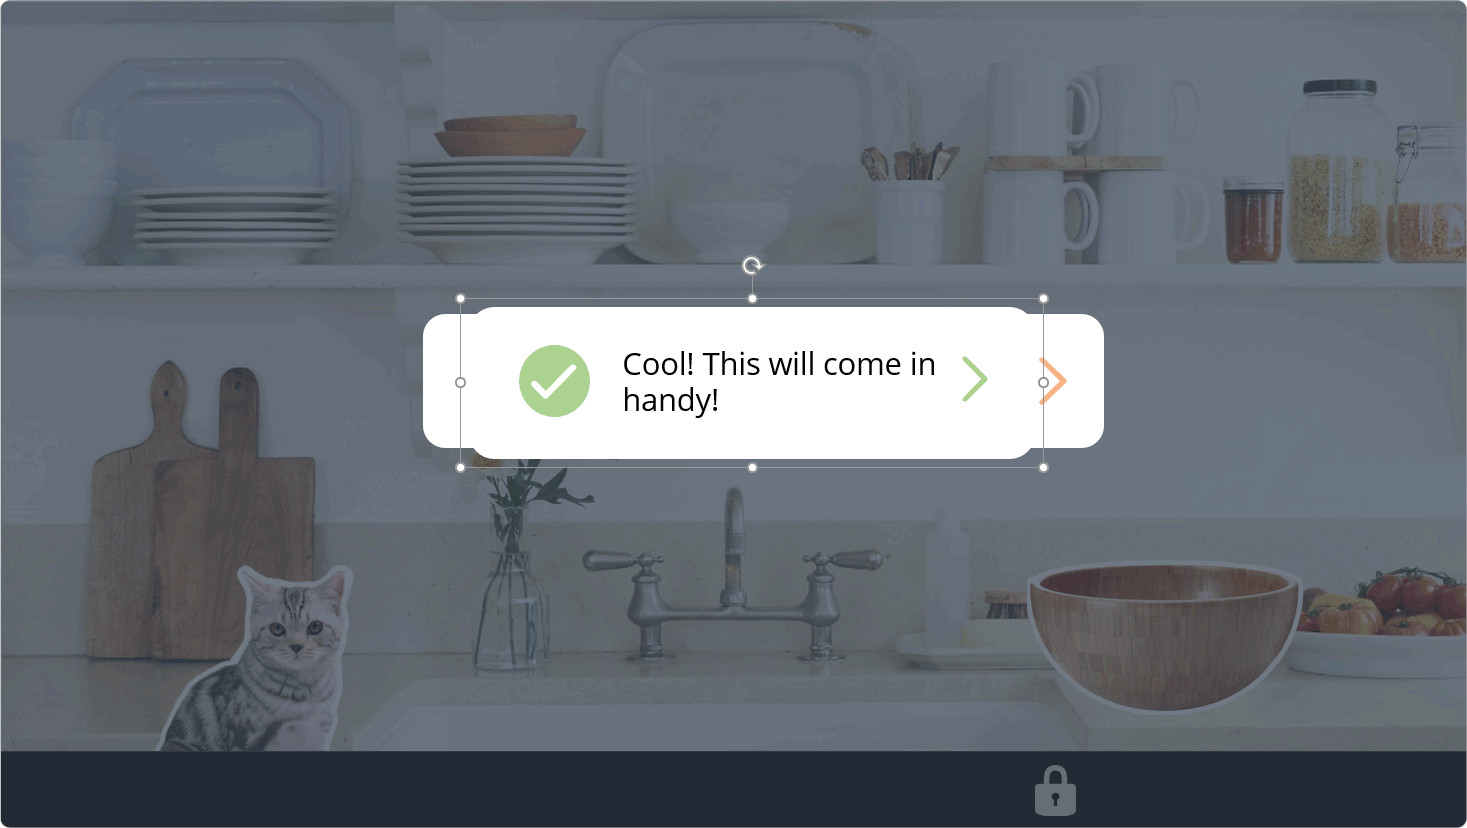
Now let’s add correct and incorrect messages for the cat and the bowl (you can find them in the resource folder too). Please set the correct message under the incorrect one:
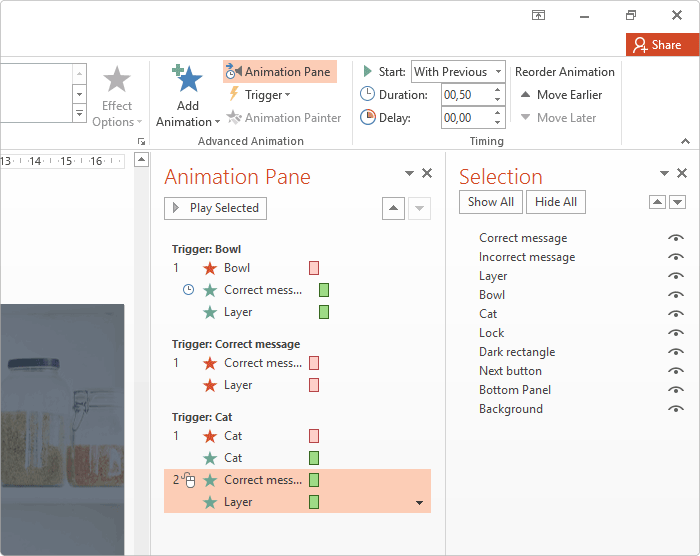
TIP: Rename all the objects so you don’t mix them up. To do that, go to Home → Arrange → Selection pane.
Stage 2. Creating triggers for the objects
A trigger is a PPT effect that tells an object to do something at a certain time. For example, there is an object called “Cat”, and if you click on it, it will trigger the appearance and further disappearance of the incorrect message (because we obviously don’t need a cat to cook an omelet. It can help us eat the meal later though).
Let’s create triggers for the objects on the slide and animate them. We should send the transparent layer and the incorrect message to the bottom of the presentation to work with the main objects first.
Creating animations and triggers for the correct object
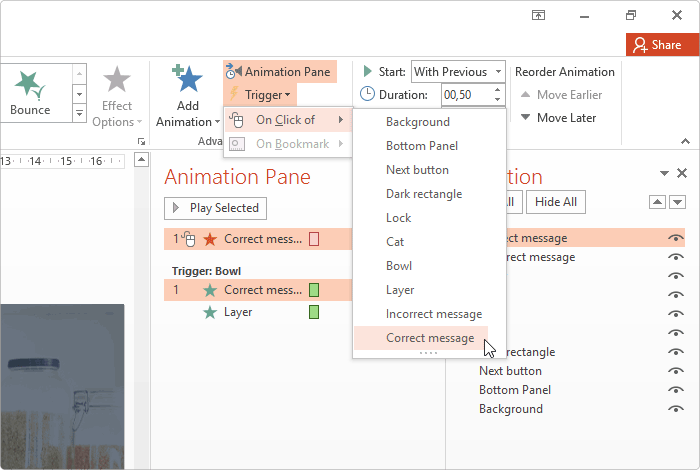
Let’s start from the bowl’s animation. First, you need to create the entrance animation for the correct message. Select the message on the slide, go to Animations → Add animation → Entrance → Fade. After this, we should add the animation by clicking on the bowl, and this is what is called the trigger.
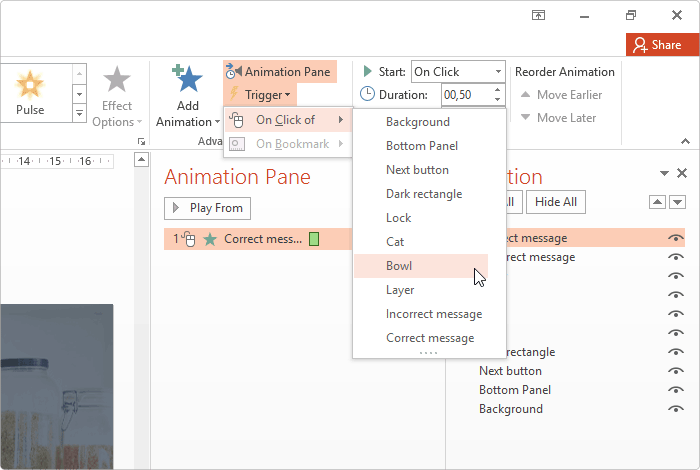
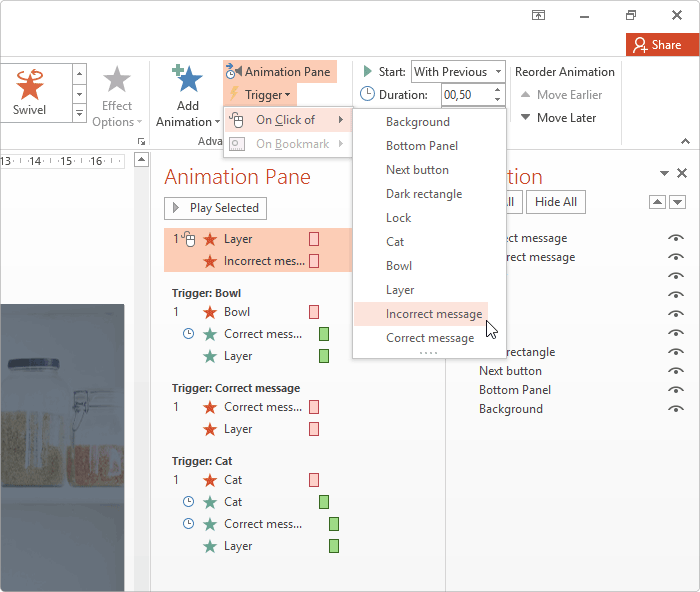
To add a trigger, select the correct message once again. Then go to the Animations → Trigger → On click of and select the correct object (the bowl).
Block the background to prevent an infinite loop of clicking on the bowl. To do that, we need the transparent layer that we transferred to the bottom of the slide. This layer allows us to see the background with the kitchen but doesn’t allow us to click any of the other objects like the cat. It must appear after clicking on one of these objects, so we have to make an animation with it too.
Then select the transparent layer and drag it back to the slide. After that, go to the Animations tab, choose the Fade animation, and transfer it to the previous animation in the Animations list to make them play at the same time. Then set up both of these animations to start with the previous ones.
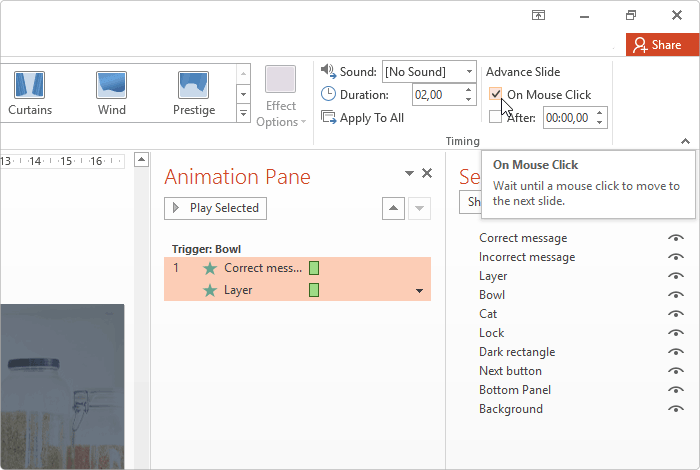
To see the result after previewing the slide, you should also uncheck the On Mouse Click checkbox in the Transitions tab.
Now we can’t click on the bowl once again due to the layer, but we can’t return back to the previous state where we can click on something else. To do that, we’ll add an additional trigger and exit animations.
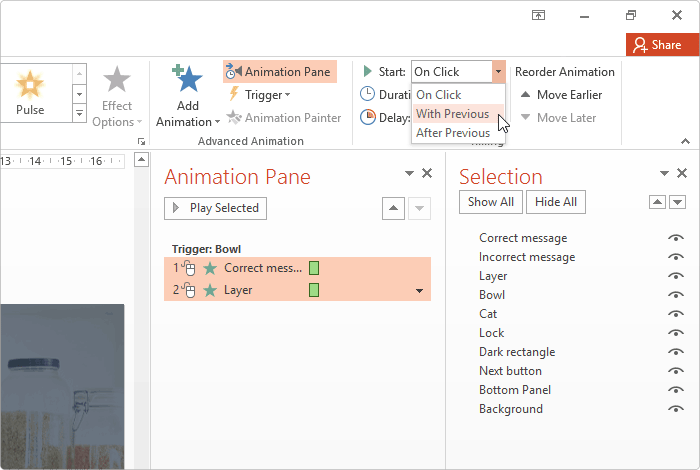
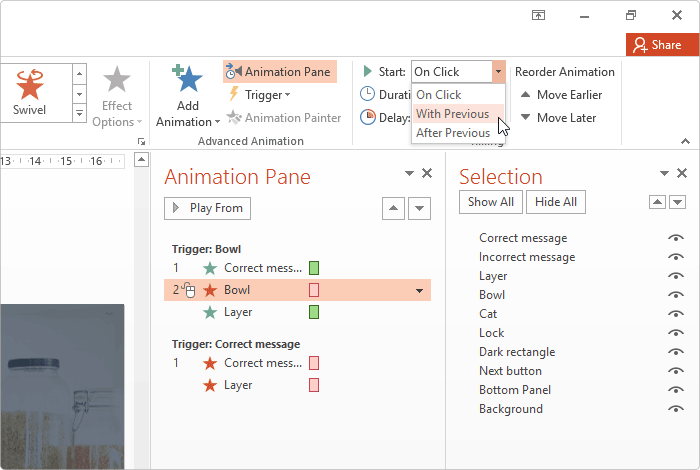
Click on the correct message, go to Animations and add the Exit animation (the Fade effect). Then add a trigger and choose On click of the previous animation (in our case the correct message animation).
Let’s also add a Fade animation to the transparent layer. Select the layer, go to the Animations tab, and add the Fade exit animation. Now group both of these animations using the Start with previous option. To do that, transfer the layer animation after the correct message animation, select them both, and select the Start with previous option:
After that, move them under the entrance animations in the Animation pane.
Let’s reproduce these steps in the slideshow mode. When you click on the bowl, the correct message appears. And after clicking on the same message, the transparent layer disappears, and we’re able to click on other objects.
Making the correct object disappear
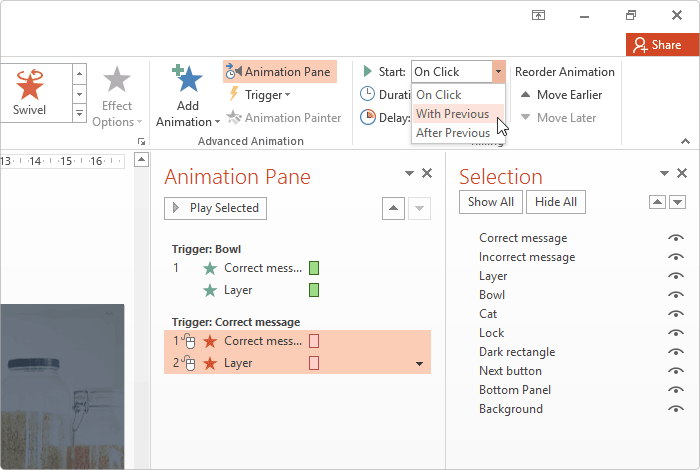
Now we need to make the bowl disappear after choosing it to create the impression that we’ve added it to our inventory. There are two ways to do this: transfer the transparent layer to the bottom once again, or select the bowl in the selection pane and create an Exit animation for it.
Open the Selection Pane: go to the Home tab → Arrange → Selection pane. Click on the bowl in the drop-down list and create an Exit animation for it.
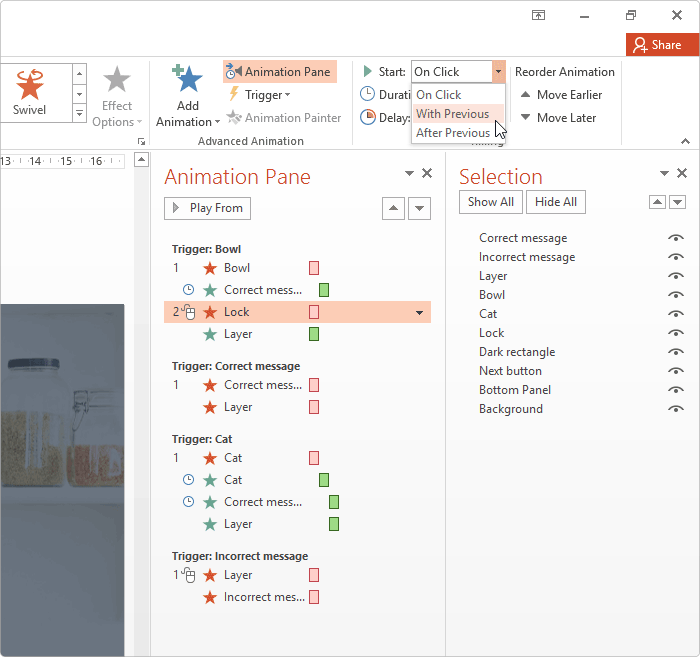
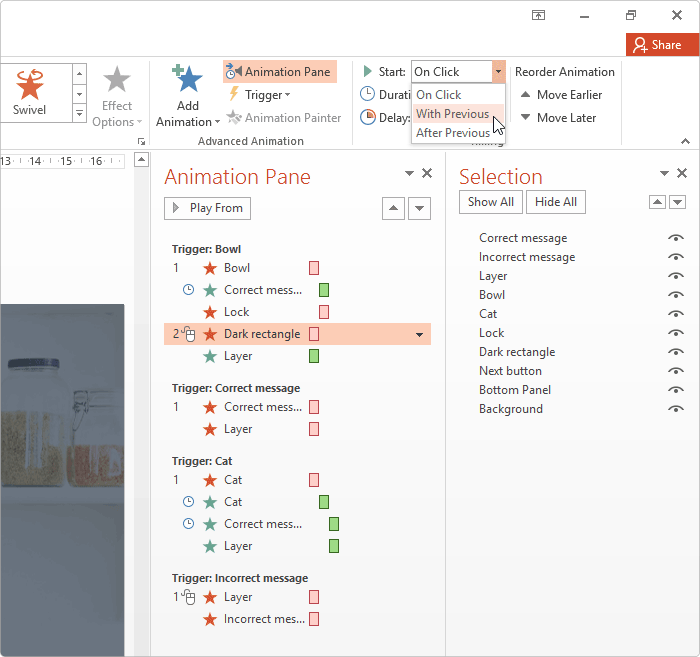
Go to Animations → Add animation → select the Fade exit animation for the bowl. Then drag this effect to the bowl’s list of animations, put it in the second spot to make the bowl disappear after clicking on it, and click on Start with previous.
We can also make the bowl disappear before the message appears. To do this, move the exit animation to the top of the bowl’s list and select After previous for the rest of the animations.
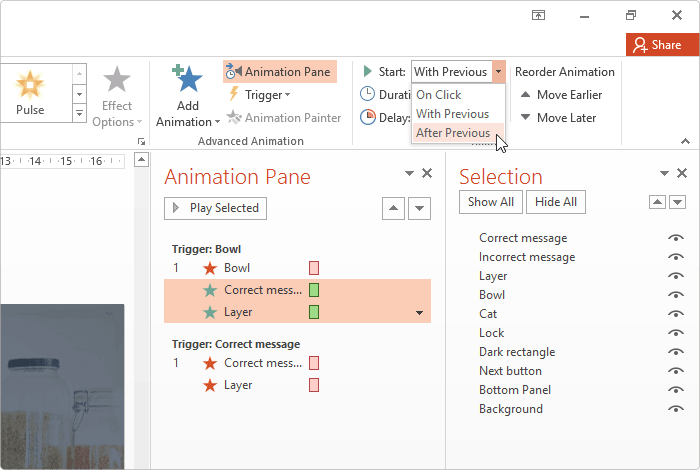
Make sure that you also customize the last animation of the transparent layer and set the “With previous” option for it.
Congratulations! We’ve finished creating all the animations and triggers for our correct object on the slide.
Creating animations and triggers for the incorrect object
Let’s repeat almost all these steps to make the animations and triggers work for the cat.
Drag the incorrect message over the correct one, right-click it and select Bring to front to make the message box visible.
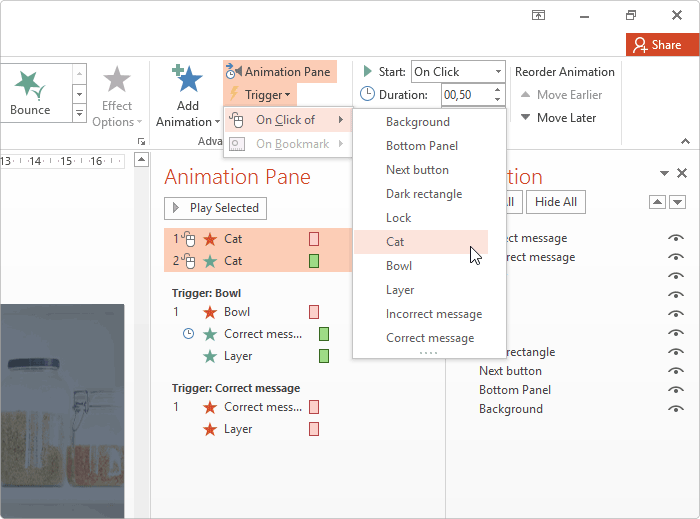
Select the cat in the Selection pane and add an Exit animation for it (Animations → Add animation → Exit → Fade). We also need to add an entrance animation to show that the cat was selected incorrectly.
Make a trigger for these two animations. To do this, select both of the Cat animations, go to Trigger → On click of and choose Cat.

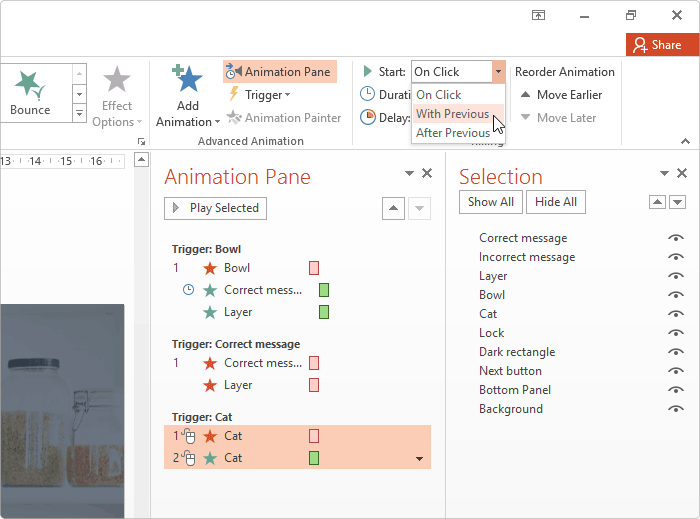
Select the Start with previous option for them.
Add the entrance animations for the transparent layer and this message (same as we did it before).
Drag the entrance animations to the new trigger with the cat. Here’s how it will look:

Make the same settings as for the bowl (you should also set the After previous option for the cat’s entrance animation, After previous for the 3rd animation of the layer, and With previous for the 4th, the incorrect message).
Now we should set up the same exit animations for the incorrect message. Select the transparent layer and the incorrect message on the slide once again, set the exit animations for them, and create a trigger for the incorrect object:

Stage 3. Setting the animations for the Next button
Now, we have to add animations for the lock on the bottom panel to make our game more interactive and to show the learners that they’ve successfully selected all the tools to unlock the navigation.
Select the lock and add an exit animation for it. Drag this animation to the place between the entrance of the correct message and the transparent layer in the Bowl’s list of animations, and set the “With previous” option:

The last step is to make the Next button visible after the lock disappears. There’s an interesting trick with the dark rectangle which we put over the button. If we click on the correct object (in our case it’s the bowl), the disappearance of the lock on the bottom panel will provoke the disappearance of this dark rectangle, and the Next option will be available.
Select the dark rectangle in the Selection pane and add the exit animation for it. Drag this animation to the bowl’s trigger under the lock animation and set the option With previous.
Note: This dark rectangle on the bottom panel has a restrictive function by hiding the Next button. It’s also very important that this dark rectangle hides the Next option with the hyperlink completely to avoid accidentally redirecting your learner to the next slide. So your users will go to the next slide only after choosing all the correct objects on the slide.
This rectangle shouldn’t have any hyperlinks or transparent layers that allow you to go to the next slide; only the next button has these things. To perform this trick it is very important to have a solid background or a solid bottom panel.
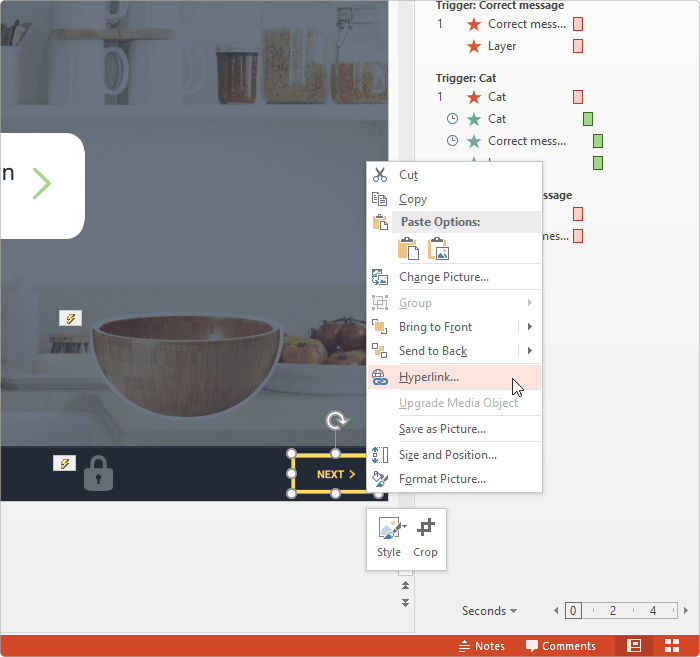
Stage 4. Setting up the link for the Next button
Now let’s add a hyperlink to the Next button. Move the dark rectangle to the bottom for now. Actually, we have an image called Next button, and to add the hyperlink to this button, you should right-click on the picture, choose Hyperlink in the drop-down list, and select a place in the document.
Thanks to these tricks, your learners have to click on all these objects to go to the next slide of the presentation, and they’ll read some useful information in the pop-up messages so they can’t miss these objects. It’s a very convenient way to take information and share it with your learners, and it’s also quite a simple way to create your own mini game.
